4 fabric painting techniques
Make patterns on your fabrics.
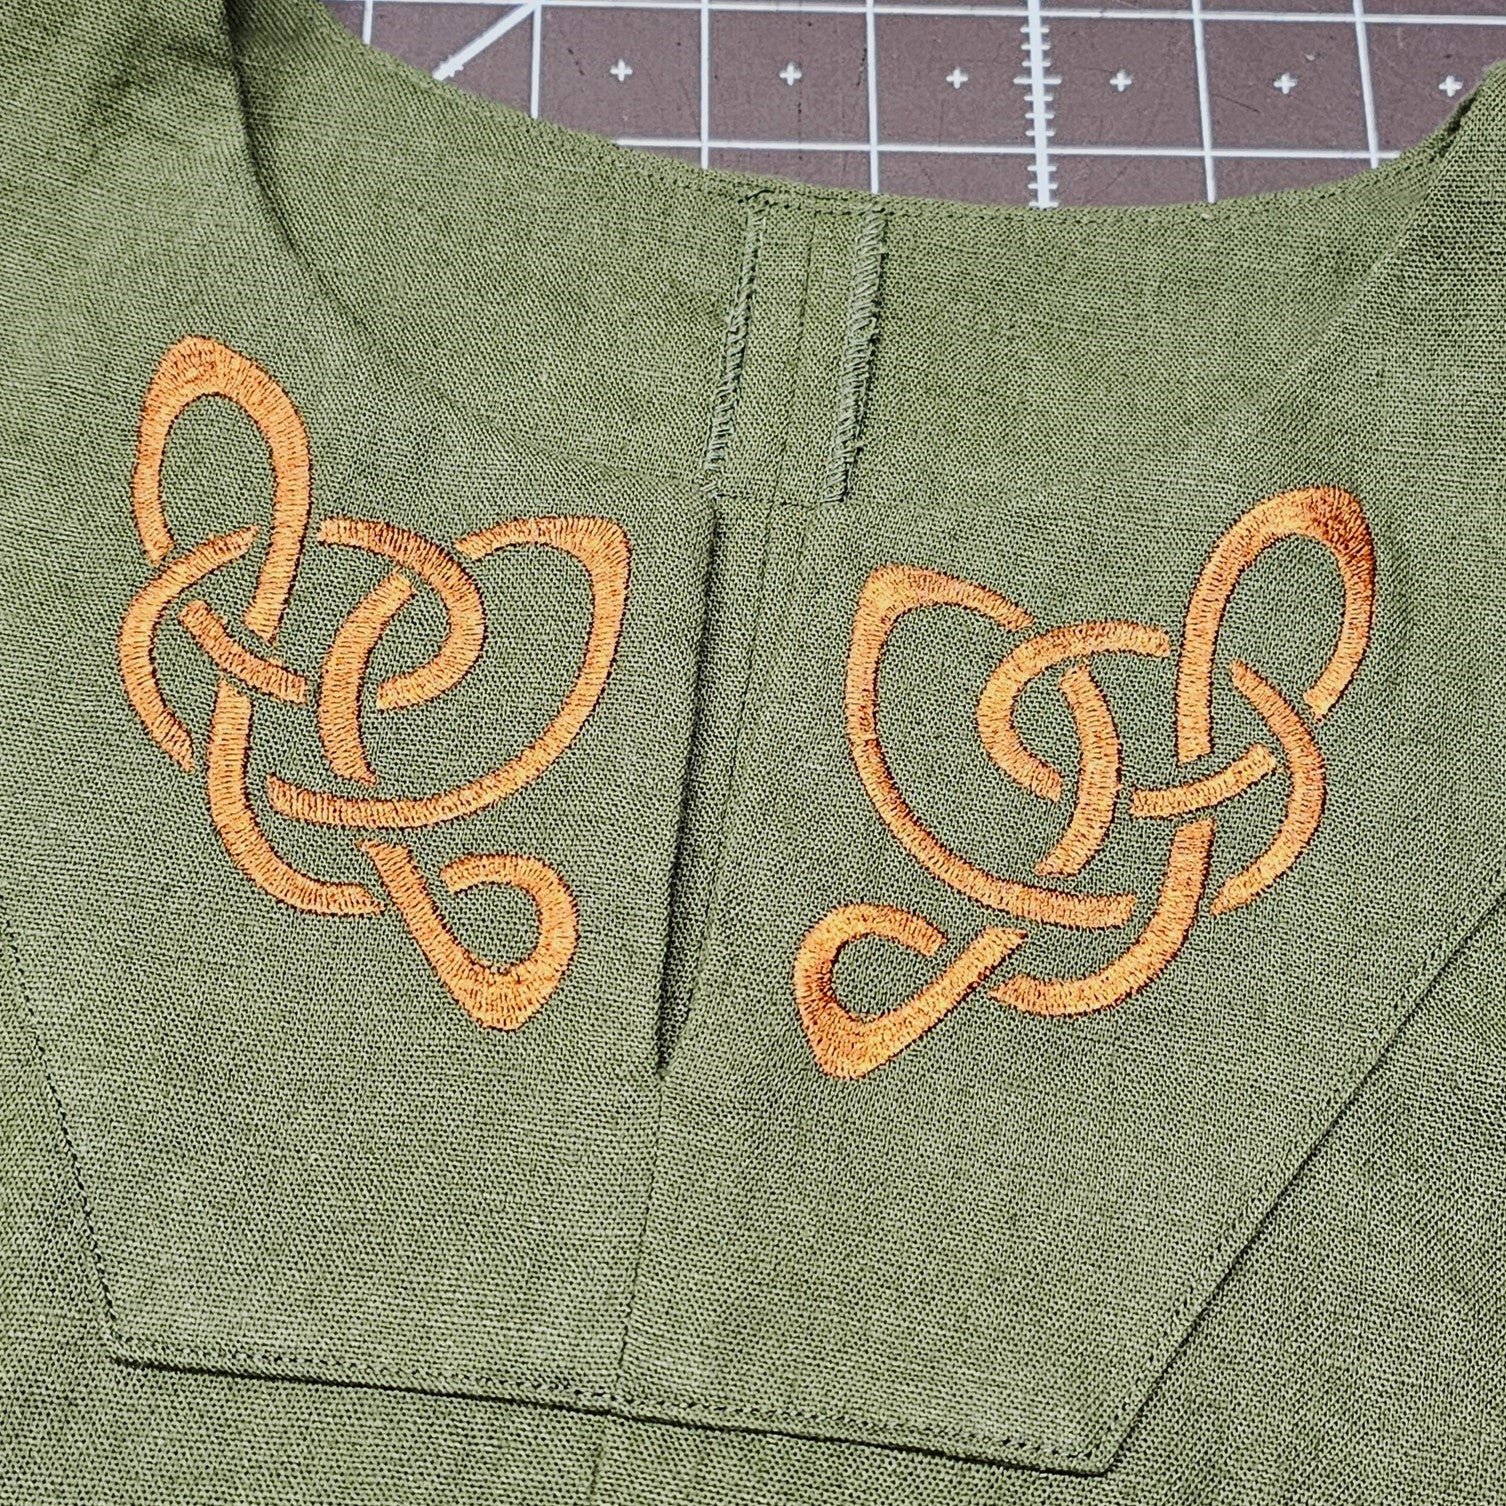
This is the kind of thing you might want to do eventually. It's pretty inevitable in the world of cosplay making: The question marks on the
And depending on the costume, the look you want to give… and the time you have in your hands, you really have a plethora (yes, yes, plethora – you didn't expect to read that word today, right?) ways to make patterns, designs and illustrations on your fabric.
The most classic way is painting. So, I thought I'd make a small overview of the 4 most used techniques.
Painting is within everyone's reach
It’s true that there are paints made specifically for fabric. But to be honest, I just use acrylic. It's not too expensive, and it's easy to use. I really like the brand Folk Art*. There's a super wide variety of colors, and there's even metallic and shimmer options, and a range of Color Shift with 2 color shimmer effects (that's pretty cool).
If you want, you can add fabric medium. It's not always essential, but it helps to give a softer texture to your paint (thus, softer to your fabric too).
With medium, your paint spreads better. If it spreads better, you put less. And if you put less, it's less thick, and there's less chance of it cracking afterwards.
When it comes to brushes, I like soft tips, but too soft. However, very stiff, short-haired brushes are also handy for tapping your fabric.
The important thing is that your brush is of good enough not to lose its bristles. There's nothing worse than trying to pick up a hair in fresh paint (and smudginf everything along the way).
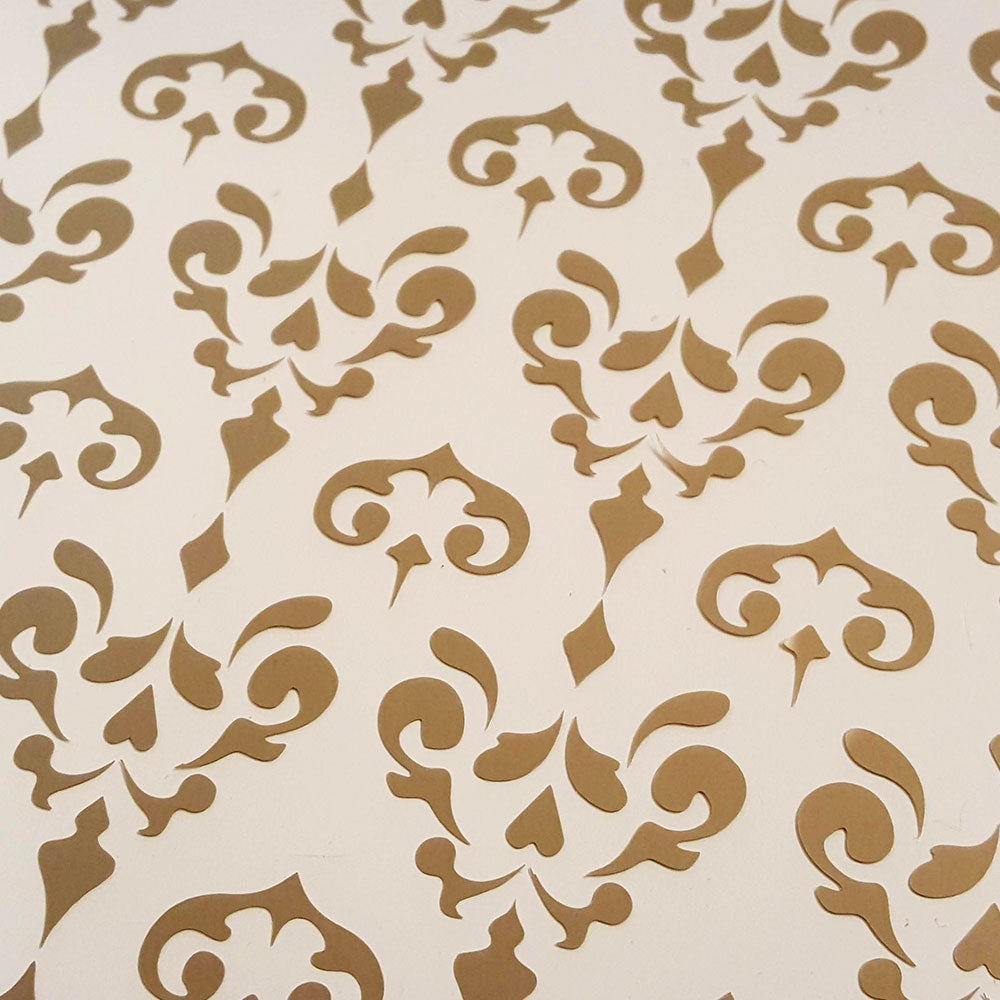
1. . .stenciled
This is my favorite technique. A particularly interesting technique if you have a simple pattern to repeat.
You have all kinds of ways to make stencils. Personally, I like to use clear adhesive vinyl. You know, the stuff we used to cover the books at school (why did they ask us to do that? the book would get damage anyway … but I digress).
What I like about adhesive vinyl is that it sticks to my fabric (so it doesn't move while I paint), but it also peels off really well (without damaging anything). And the advantage of using transparent (in addition to the fact that it is often the easiest to find and the cheapest), is that you can see what is happening around your design, on your fabric. So you can make reference points on the vinyl to make sure you place your stencil correctly.
If I'm making a simple design, I usually cut my stencil with an exacto knife. For the more complex ones, I work with my Silhouette Portrait (if you wanna know more about this little machine, it's over here).
Don't worry, even if you don't have a cutting machine, everything can be done with an exacto knife (it's just going to take longer).
You can also just take some paper. It works too. But you can't see through it, and you're going to need something to hold your stencil in place. I highly recommend spray temporary adhesive. Temporary so that it leaves no residue. And spray cause it's way easier to apply everywhere (without damaging your stencil).
Once your stencil is done, you have 2 options (well, there are probably others, but I use 2):
- You can apply spray paint (super fast, but you have less control)
- You can also apply acrylic paint with a brush or a sponge (longer, but you have more latitude)

The advantage: the regularity of your patterns
The downside: there is a limit to the complexity of the pattern you can make if you have just basic tools.
2. . .to the stamp
The stamp method, like stenciling, is a good method for repeating a design over a large area.
You may have already made potato stamps when you were a kid… It’s the same technique. But I assure you that I have simpler (and less perishable) tricks than carving a vegetable.
I use EVA foam, and it works great. With the 2mm foam, you can carve the pattern you want to recreate. And you just have to stick your pieces on a piece of 10mm EVA (or something that won't deform - a solid cardboard or even a small wooden board).
The advantage over stenciling is that you can make more complex patterns. All parts of your pattern are fixed at the base, so it's easier to manage.
On the other hand, there are a few things to know if you make stamps:
Make sure you have the right amount of paint on your stamp. Too much paint, it will overflow. Not enough, it will create holes in your pattern... That said, that may be what you want. The stamping technique gives a very specific texture. This may be the desired effect. If not, you can always rework your pattern with a brush.
And if you have an asymmetrical design, don't forget to make your mirror pattern. Because you will turn your design upside down to stamp it...

(creation by my friend Sonia)
The advantage: more options in the complexity of your pattern
The downside: less control over the texture appearance
3. . . freehanded
Freehand painting is a great option if you have a rather organic or very detailed pattern. It's a technique that I recommend less to the beginner, but it can really do awesome things if you work well with a brush.
Personally, I use it mainly in addition to other techniques. Stencils and stamps ensure consistency in my design. But, I tend to rework everything by hand.

The advantage: the endless options of patterns and styles
The downside: less guidance – you have to be comfortable with your brushstroke
4. . . airbrush
I suggest airbrush for more abstract stuff. But also if you have something with gradient to do.
Like I mention in my article on patina, it's a great tool for adding light and shadow to a piece.
Yes, it's an investment. The airbrush and its compressor, specialized paint, cleaning materials… that's not the kind of thing you usually decide to try on a whim.
But if you like spray paint, you might like airbrush : the application is super clean, the gradients are always perfect and you have a lot more color options than with spray paints (plus the fact that it's way more eco-friendly than buying a bunch of cans).
It takes a bit of practice to master the tool. But it really gives great results.

The advantage: the gradients are flawless every time
The disadvantage: the basic equipment is quite expensive
bonus option. . . felt-tip pens
I include fabric markers in the paint, because it's kind of on the same principle... but it's pens instead of brushes.
If you're looking to make a freehand design, but aren't comfortable using a paintbrush, felt-tip can be a great solution. Let's say, you have lettering to make. Writing with a brush is not easy (unless you are a master of Chinese calligraphy). So maybe the felt-tips are the option.
Attention, however, there are 2 important details to consider:
- It's best to work on a light background.
It's ink, not paint. So you won't be able to bring out colors on a dark background. The best is still and always white, but it also works on pale fabrics. Take the time to check how your pencil colors come out though (it can change depending on the background).
- Watch out for bleed.
In a more or less intense way, your fabric will drink the ink from your pencil. Do a test before you start to see what happens. Sometimes it's not much. But sometimes it dilutes your design in a really intense way. And maybe that's not what you want.
Besides, when I say "do a test", I don't mean to draw a line on your fabric, and tell yourself instantly "good, it comes out fine". Let your fabric rest. Sometimes it drinks very slowly. It heppend to me, more than once. Everything looked good… and oops, 1 hour later, the pattern is super diffuse.

The advantage: ease
The downside: the color choice can be quite small
- - - - - ✂✂✂ - - - - -
Now, try and easily mix techniques to get different results.
And, you know what? There's more than paint to add patterns and design to your fabric. There are plenty of other ways to make designs, which will give you different looks, textures and effects: embroidery, appliqués, cutouts...
We'll talk about it soon.
in the meantime… Keep on crafting!
🤓✂🐙