Autopsy of a project: Gir costume

Character: Gir
Provenance: Invader Zim animated series
Client: Héloïse, 1 year and ½
Cuteness level: infinite + 1

I don't know if you know about my Halloween giveaway. This is a little contest I make where I offer the making of a kid's costume to a lucky person. I love making costumes for toddlers. It's tiny. It's cute. And I don't do it often. So I spoil myself, once a year, for Halloween. And I make a tiny costume. 🎃

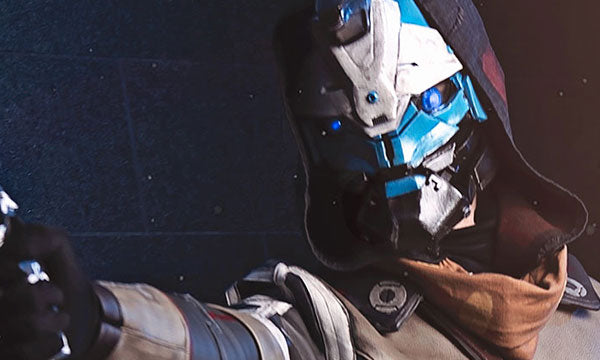
This year, the winner is Héloïse, 1½ years old, for whom I made the costume of Gir , the hyperactive little robot in Invader Zim . In fact, it's the character's dog costume. Yep. I'm making a costume's costume (so meta).

Because, you know. So cute!

référence cosplay de Gir - Zim Invader

So here's how I put it together.

Step 1: it's time to plan

Find plenty of images of the character (or a gif of the dancing character) to see it from all angles. Study it. Choose the techniques to use. Then choose the materials.

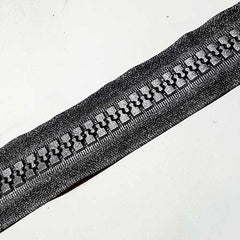
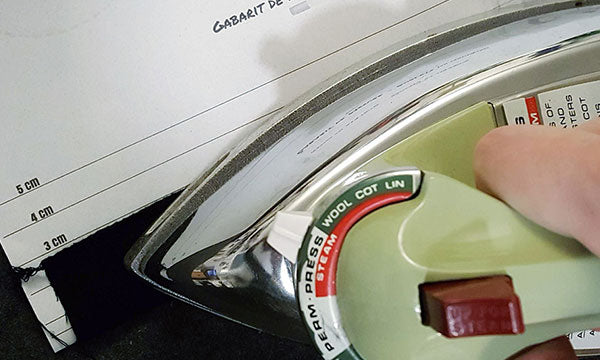
Here, 2 important points: the mega zip and the huge head.

That kind of mega zipper cannot be found anywhere. But with a little research, you can. I bought mine on Ebay.

I went for a size 20. By the way, if you shop for zippers online, the size is usually the width of the prongs in millimeters. So yeah, we're talking about 2cm wide here.

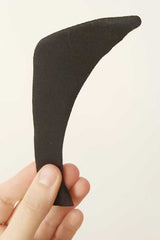
For the big head, we didn't want to cover Héloïse's face, as she's a tiny human. So I opted for a hood, open face. But I still needed a way to make that huge square head. Plan some tests.

Finally, for the materials: I opted for the polar fleece. It’s not too expensive. It gives a fluffy feeling that matches the style of the character. And it would be hot enough for the end of October. And to put on the mascot-style hood, the fleece is just the right fabric for this kind of project (I'll explain later).

mega zipper

- - -

Step 2: pattern and testing

Either find the pattern that's right for you or you just do it. Personnally, Imake mine as it's my specialty.

So for Gir, I started from pajamas of Heloïse (to get the right size), which I traced on paper and make the changes I want.

I didn't do a mock up for the costume as it was pretty straightforward and I knew where I was going. But, sometimes, it can be really worth doing a test cut in another fabric, just to make sure you get the right fitting (remember my article on the basics of a costume awesome - a good fit is important)

Then there was some hood testing. To see if the image I had in mind matched reality enough.

I made a basic balaclava, found that my shape wasn't working at all. And I adjusted it. Then I made a mock up out of cardboard to see if that made sense.

cagoule, version 2
balaclava version 2
mock up de carton
mock up of cardboard (with way too much tape to hold all the changes I made)
- - -

By the way, a styrofoam head like that is too small if you are working on an adult project. But, for my tiny human projet, it's a pretty good size (even a bit big).

Step 3: assembly

Once you are satisfied with your pattern and your tests, you move on to the next step : Cutting the fabric and building the costume.

Side note... I love the rotary knife. Since I have a gigantic cutting board, I hardly ever use my scissors to cut my pieces anymore. 🖤 ​​

Convenient. Precise. Effective. Love it!

coupe des pièces - couteau rotatif
- - -
First: the mega huge zipper.

The zip of Gir's costume is silver. Mine was black… Solution: spray paint! I like it because it gives the zip a cartoon dimension since you can still see the black underneath.

Be careful when painting a zip, the thicker you paint, the less it will slip (so go light).

Once the zipper was installed, I assembled the onesie. I finally opted for ponte roma for the arms and legs, just to have different textures (I like the textures!)

mega zip argent onesie avec le mega zip
- - -
Next, the head shape.

So for the hood, I used my cardboard pattern and created my upholstery foam shape. It's super cool as a material because it's light, soft and quite easy to work with.

On the other hand, there is always a bit of tweaking and re-sculpting. As my pattern was made of cardboard and my final material was 1" thicker, I needed to adjust a couple things. I cut the sides at an angle. Then I thinned the bottom edge. And finally, I completely remade the top piece, once the rest was "seated" on my head.

coupe du foam à l'exacto ajustement de la forme forme de foam sur la tête
After a bit of tweaking… the shape is cool.
- - -
Next step: cover the head.

Earlier, I told you about the fact that I fleece is a cool fabric for mascotts. I'll explain why:

  • It's a knit, so it stretches pretty well.
  • It also means that it doesn't fray. So you can use it raw edge.
  • It's thick enough to lose the imperfections of the base foam shape underneath (we like forgiving materials).
  • The fluffyness of the fabric makes the seams less noticeable a bit. This is super handy when you have plenty of cutouts and dart to adjust your fabric on the shape. But also when you finish a seam by hand ... it's less obvious.

All of this makes this a fabric that works really well for covering shapes and whatnot. Especially when you don't know exactly where you're going, don't have a pattern and you're likely to make small adjustments along the way.

Honestly, I don't know if there are better techniques, but I like wrapping my piece with my fabric inside out. This way, I pin my excess fabric by creating darts and I can machine sew everything. Then, I come back to test my cover on my form to be sure it fits.

After that, I just had to assemble the cover and the hood base.

recouvrir la pièce épingler les pinces Recouvrir la forme finale
- - -
And now, the additions.

Before covering the top of my head, I tackled the ears. There were 2 important things to keep in mind:

I wanted the ears to hold up nicely.
But I also wanted something soft and supple.

So I opted for a base in craft foam . 2 layers to make it more solid. But also to be able to fold up the base, in order to have a seat on your head. I could have left them in eva foam (or at least, primer, paint and all), but since I wanted to stay in the same textures for the black elements, I covered them with ponte roma like the black parts of the onesie.

couper les oreilles en craft foam créer une housse en tissu recouvrir les oreilles
- - -

I also prepare the eyes and the tongue.

Once the ears, eyes and tongue were ready, this is where I install everything and finished covering the top of the head.

Everything is done by hand. At this point, there isn't much that fits under your sewing machine anyway .

installation des oreilles installer et épingler les éléments coudre les éléments en place
- - -

Step 4: the finishing touches

When most of your costume is assembled, there are finishes, details, touch-ups.

The final touch on Gir's costume is the large stitching. I made it with an acrylic yarn, double thread, so that it would be clearly visible. I also made the pupils and the muzzle out of the same yarn. I don't have much embroidery technique... the important thing is that it has the desired shape and that it holds up well.

costume de Gir, devant Costume de Gir, dos costume de Gir, cagoule
- - -

Just need put it on Héloïse. I can't wait for Halloween! 🎃

We'll talk to you soon.
Until then… Keep on crafting!

🤓✂🐙

.

Please note, comments must be approved before they are published

This site is protected by reCAPTCHA and the Google Privacy Policy and Terms of Service apply.