


Set up your workshop in 5 phases
Setting up (or rearranging) your workshop is no small task… Depending on the space you have, there are all kinds of challenges.
You may have a big game of Tetris to do to make sure you can place all your furniture. Maybe you need to share your space. Or you lack organization. Or maybe you're just not too sure of the best way to set everything up...
I've been doing a big makeover of my workshop recently... So thought I'd show it to you. Plus, I got a 5-step plan for a successful set up/makeover of your workshop.
1 - Make a plan
When I decided to transform my workshop, the first thing I did was to draw up a plan to get a good idea of my space.
Whether it's for a complete transformation or just for a small change, it's super useful to make a plan to scale. It doesn't take too long to prepare and it allows you to do lots of tests super quickly.
Take the time to measure your space and furniture to make sure you can easily test your layout ideas.
I made my plan with Illustrator. It’s useful because I was able to test different configurations super easily. But it would do well with all sorts of other software. Or even by hand.

It's like anything. When you start a project, it's always a good idea to make a plan.
Whether it's a list of work steps, a quick sketch of the accessory you're about to create, or even a template or pattern for your future costume. Whether your project is small or large, my best advice: start with a plan. 🤓
2 - Make sure you have a nice work surface
No matter the size of your workshop, you need a nice work surface. And by that, I don't necessarily mean something large. Of course, it's cool to have something big. But if you don't have the space, at least make sure your surface is pleasant. Your table should be at the right height. Your tools, well installed. And above all, that everything should be well lit.
My cutting table
If you sew, having a large cutting table in your workshop is quite essential. You want to be able to place your fabric to cut your pattern pieces as easily as possible.
I had a nice sized table... But it was never at a height that really suited me. And in terms of space efficiency, it was pretty awful too.
So, I spoiled myself ! Here's my new cutting table:

This is a big assembly of different IKEA modules:
- 2 KALLAX 2X4
- 3 EKBY ALEX drawer shelves
- 2 LAGKAPTEN table tops 60cm X 200cm
- 2 OLOV adjustable table legs
- 1 ALEX drawer unit on wheels
Kallax are super practical for storing materials for my current projects.
The EKBY ALEX add just enough height so that I can work comfortably standing up. In addition, I got drawers so that my pencils and whatnot are within reach.
The 2 side-by-side table tops really give me an incredible work surface (120cm X 200cm, it's huge and I love it!).
I could have gotten a large melamine board to avoid having a crack in the middle of my table... But given the size, I wasn't too sure that it would fit in my staircase which turns to go down to the basement.
* The OLOV legs, I don't have them yet, because they weren't in stock when I ordered... The table is holding up very well. But just to be on the safe side, I still plan to add them.
The ALEX drawer on wheels is just a bonus. It's not attached to anything, but the space at the end of the table is perfect for tucking it under.

My sewing machine corner
Finding something to install my sewing machines was quite simple. But, since there are always things I like to have close at hand when I sew, I made sure to have storage for my small tools, my threads, and all.

The IKEA recipe (yes, what can I say, IKEA made it so easy):
- 3 LINNMON table tops 60cm X 100cm
- 2 ALEX drawer unit
- 4 ADILS legs
It gives me a very long surface, big enough to accommodate my 2 machines (and eventually more 😉). And the drawer units make it more sturdy.
My crafting corner
I know that not everyone can do this... but since I have a large workshop, I can afford to have several workstations.
I added a little extra crafting corner. A corner dedicated to working with EVA foam, painting, etc. The idea is to keep my cutting table super clean for fabrics.
I was so excited about the utility cart I bought myself when I made my perfect ironing corner that I decided to buy another one.
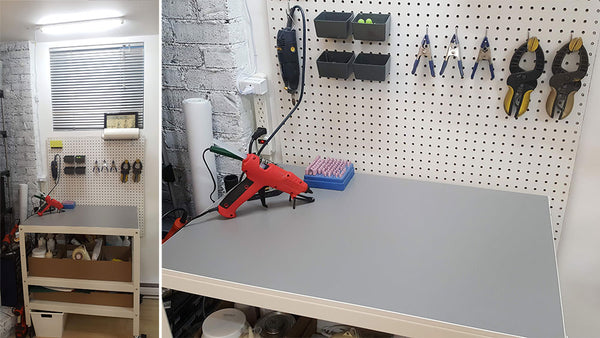
I used large cardboard boxes to make some kind of drawers (to facilitate access to the stuff at the back).
Lighting
Another thing not to underestimate to make your workspace is pleasant, is the lighting. You wanna see what you're doing. Right?
I work in a basement. I don't have that much daylight. And anyway, I wouldn't trust that, because I don't just work while there's light outside (and I'm sure you don't either).
I found something quite nice: LED light strips. It gives a neon look, but the light is more pleasant (neons have a weird color…). You can plug them individually or attach them to each other. And it's super easy to install. No need to change your ceiling light, it's something that you plug in the wall (with a small switch along the wire).
My workshop is pretty big, so I bought 4.
I put 2 above my cutting table. And fix them to my ceiling light with an adapter like the ones we use to install Christmas lights outside. So I can manage them with my main switch.

(ok, the wires attached to the ceiling is a little weird, but that's okay...)
I have 2 other sets above my ironing area and crafting area.
I also installed small additional lamps above my sewing machines.

And the most awesome in all that, is that I manage everything with my cell. Bought myself some smart plugs which I installed my lights on.
That way, I don't have to go around my workshop to turn everything off when I'm done. I close everything on my phone.
It also means that I can make sure that I have turned everything off if I have any doubts a couple of hours later (this happens really often - like, litterally just now). And there's even a function so that everything turns off automatically at a certain time (just in case).

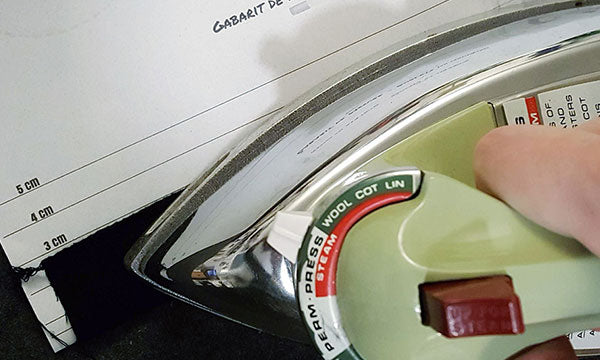
The ADHD in me finds this really handy. So much so that I have one for my iron (to be sure that it doesn't stay on for hours) and another for my glue gun (in case I forget it…)
3 - Think about a good storage system
There are plenty of options for storing your stuff in your workshop, and the best storage system for me is not necessarily the best system for you.
It's really important to think about how YOU want to store your stuff. And I'm not just talking about classifying your buttons in order of size or color… But above all, what are you going to put them in? What's easier for you. What makes finding everything easier, but also putting it away faster.
(I already covered this in my organizing article, you can go check it out if you want more tips)
For me, it's really important to have stuff that's easy to store (boxes with lids, stacked up, just pisses me off). I am lazy and impatient when it comes to storing my tools and material. But I also need to find my things quickly.
I really like fabric bins. I have them everywhere (under my cutting table – in the Kallax – but also on shelves).
But for the smaller stuff, I've been looking for the best system for a long time. I've tried many things over the years. And that's what you should do too. Try different methods, test things, tweak stuff... You'll end up finding THE storage system that's made for you.
Compartment drawer
I owe my new system to Alexandre Chappel. A guy from Norway who does all kinds of stuff. Very often, furniture to improve his workshop (which I really like, by the way).
I love watching him assemble furniture so much that he almost made me want to make my own from scratch. But the truth is, I'm not equipped for that at all... so, IKEA. 😅
That said, he created a storage system for his drawers. And it's really cool.
Everything is 3D printed. There is a grid that you stick to the bottom of your drawer. And buckets. Lots of buckets. Of all possible sizes. And the bottom of the buckets has a relief to fit on the grid. This keeps everything in place. It's super clean. And since all boxes fit perfectly on the grid, everything is easily interchangeable. It's beautiful!
So, I bought his files so I could create a super clean storage system in my drawers too.


I'm going to be super honest with you. It's really long to print a bunch of buckets like that. And ultimately, it's not so economical if you make as many compartments as I did (I still have 21 new drawers in my studio – there aren't small compartments in each drawer, but still).
But I don't regret anything. I really like my little compartments. I can move them and change as needed. Everything is holding up well. It's beautiful. It's clean. And it's easy to access and easy to store.

Crazy.
If you 3D print and that speaks to you, go check out his website (he has lots of other really cool stuff).
By the way, the tags, which you may have noticed on the drawers, are also 3D printed. This is a model that I created. And it's available (for free) on my shop.

Ribbon and lace drawer
Obviously, this system of small compartments is not necessarily the best option for everything.
For example, for my elastics, lace, ribbon, braid, and others, I opted for something else. A slightly more affordable system, which you can make super easily yourself. All you need is corrugated cardboard (and let me tell you, after the IKEA order I made, I have plenty!).
The idea is super simple:
- I prepared drawer sides with slots by overlapping pieces of corrugated cardboard.
- Then I cut strips of cardboard just the right length to slip into the little slots.
- I wraped my ribbons, laces and the like around the cardboard and just slip it into place.
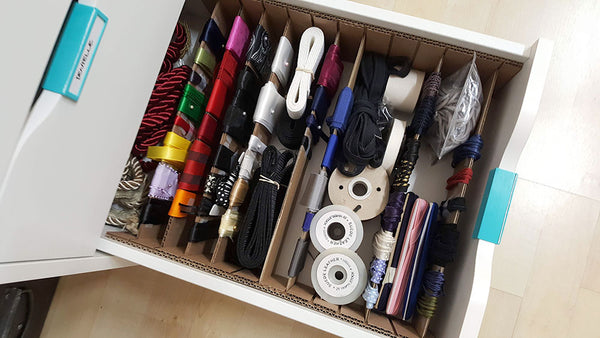
The whole thing slide like a charm. And it even creates sections in my drawer to hold other stuff. Simple, but oh so effective.
Pegboard
If you didn't already know, I worship the god of pegboard. What can I say, pegboards is life.
So, I now have even more of them (my man didn't think it was possible 😅).
It's just so convenient to see your tools at a glance.

I ordered some new hooks... I'll be able to finish filling this very soon. 🤩
4 - Schedule time. Lots of time
We can't escape it, setting up a workshop is a long process. Work it into your schedule.
My workshop makeover involved quite a few things:
- Removing everything on the walls, then patching and repainting the walls full of holes (damn there were shelves everywhere…)
- Getting rid of furniture I no longer needed
- Sorting my stock
- Assemble new furniture (8 independent modules to build and assemble together to create what I wanted)
- Installing new pegboards, some shelves and more.
- Installing the lighting system
- Organizing everything in the new drawers (21 new drawers, that's a lot of drawers)
All of this takes time. And often more than you think. So schedule time. And don't forget a buffer. Just to be sure. 🤓
5 - Leave some room for pretty stuff.
I know that, as a cosplayer (or crafter of any kind), you have a lot of stock. And I'm the first to suggest putting storage everywhere. Shelves that go up to the ceiling, pegboards on every free space...
But don't forget to leave some space for decoration. Whether it's a few photos of your best achievements, or some of your props hanging on the wall. Or fanart of your favorite artists.
It's inspiring to have a bit of beautiful things around you. No need to put it everywhere. But it'll bring life to your workshop.
I still have stuff to install. But for now I show off the illustrations of SoMeow and Marie-Eve Pharand. Beautiful stickers of Warlock's Quill. And some cute creations and weird things I like.


I still have a few things to adjust and add. But overall, my workshop is ready for my next projects. Yayy!

(psst! If you want to see the evolution of my workshop, I have pictures of what it looked like from 2016 to 2020, in my organization article)
Talk to you soon.
in the meantime... Keep on crafting!
🤓✂🐙
.