The perfect ironing station
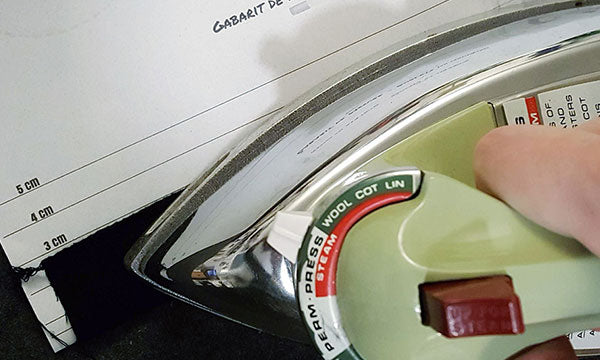
I have worked with very common irons for a long time. I used my mother's old iron. Then I found myself something practically vintage…
It did the job for several years. But when my vintage iron gave up recently, I decided I wanted to spoil myself a little. Something really good. That would follow me for a long time.
And I took the opportunity to upgrade my whole ironing set up. The bomb.
And now, I'm so happy with my new set up that I thought I'd share with you some picture, but also all the steps to build yourself an awesome iron station like mine if you want.
The iron
First, there is the choice of iron. There are quite a few models on the market. At different prices. But if you want something really powerful, pressure or gravity irons, this are pretty much the best options.
Be careful, I don't recommend this if:
- Sewing is a casual hobby (and you sew just occasionally).
- Your workshop is very small (and you don't have much space for an ironing station).
- You work more in your dining room or living room (and you have to put everything in the closet when you're done).
In this case, there are very good household iron.
Black and Decker offers some very good models in entry and mid-range prices. And for something a little more upscale, there's Oliso and Rowenta.
But if sewing is a serious business for you. That you really do it often. That it’s a passion. Or even, that it's part of your business. Then, let me tell you, an industrial type iron, could be worth it as an investment.
I opted for a Sapporo gravity iron. It's pretty much the most affordable of the "industrial" type. But we're still talking about an iron that cost around $ 250 +tx.

It is a gravity iron (that means the water tank is separate from the iron, hung high) which offers good steam power. He's not that big, but he as a good weight. It takes a little longer to heat up, but once it's ready, it's really awesome.
The installation
As the tank of my new iron must be installed high up, I built a rack for it.
You could just hang a hook on the ceiling, but I wanted something that I could move as needed (I'm that fancy).
So I bought the Bror utility cart from Ikea.
It's a small piece of furniture on wheels (which lock up - handy thing, because it's not because I want to be able to move my ironing station on occasion that I intend to iron while racing around the neighborhood).
It's also the perfect height to work standing up (be careful though, if you're short, you might find it high...).
And it has shelves (to put all my ironing stock - presscloth, shapes, folding template etc.).
I also really like the surface. Less in length (like standard ironing boards), but deeper.
And the cart is super sturdy. I can't be the only one who thinks that the damn standard ironing boards are so precarious… 😛

Once my cart was assembled, I set up a rack to hold my water tank and its wires. It is made of steel pipes bought at the hardware store.
Here is what I used (all parts are in ½" format):
- 3 x 36" pipes
- 4 T-fittings
- 4 elbows
- 2 pipes of 6"
- 4 pipes of 2½"
- 4 pipes of 1½"
- 2 caps
- 4 bases
I put all the pieces together to create my rack. I made a little plan for you so that you can easily see what's going where.

Once built, I painted it (with Rust-Oleum spray paint).

Because it's cuter. But also because those damn steel pipes there, they kinda stay dirty for ever. I washed them up, and still had super dirty hands after putting the thing together.

To secure my rack, I placed 2 pieces of wood (21" long 2X4s) on each side of my cart. I made holes in the metal sides, put the 2X4s from the inside, and screwed them on each end.

Be careful, make sure you have a good drill bit for this job. I had little problems while drilling...

Once the 2 pieces of wood are installed, it is quite easy to attach the rack (I still recommend asking someone to help you hold the rack).

The ironing surface
Even if you don't plan on doing a crazy set up like mine, I think this part will interest you anyway.
You could easily make that surface and put it on a piece of furniture you already have. Or even use it as a board you put out on your kitchen counter when you sew. And then put away when you're done.
It's sturdier than a standard ironing board. And you can make it any size you want.
I made mine 24" by 36", which I screwed onto the utility cart. It's just a tiny bit bigger than the surface of the cart and it fits really well between the pipes of my iron rack.
Here, choose the size that suits you… But don't forget that, if you want to make a portable board, you have to be able to move it easily. Not too big (to be able to store it quickly) and not too heavy (to be able to transport it easily).
Here is my material list:
- 24" x 36" OSB board
- Aluminum tape
- 3 layers of cotton batting
- Cotton canvas
- Staples ½ ’’ (not your little office stapler here… the bigass workshop stuff)
The base is made of OSB (particle board) ½" thick . I wanted to be really sure it wouldn't twist ... but I think ¼" would do the job too (and it's less heavy).

The aluminum tape is to provide a moisture barrier (you don't want mold to get into your board, right?). Plus, it's heat resistant.
To add a little softness, there are plenty of options. I chose cotton batting (commonly known as quilt batting). I like my ironing surface a little soft, but I don't want something super fluffy...
You could opt for Kodel or even an upholstery foam cushion. Personally, I find it too soft (but you are the chef of your ironing area).
The other advantage of cotton batting is that it tolerates very high temperatures. So I'm not afraid that something will burn or melt in my board.
Finally, the cotton canvas is used to cover the whole thing. Here, cotton is particularly important. Direct contact with your iron: you want it to withstand even the highest temperatures.
Being really fancy, you could also opt for a teflon fabric. But personally, I know myself, I will end up staining my board... so I want something that will not be too difficult for me to replace.
Once you have all your stuff, here's how to put it all together:
- Cover the top of your board with tape aluminum

- Place your 3 layers of cotton batting on the floor. Then place your board in the center (aluminum towards batting). Make sure you have at least 2-3" batting exeeding the board all around.
- Fold the layers of batting over the board and staple all around. I recommend that you start with the centers.

- Cut your excess as needed.

- Then make sure you fold the corners well.

- And finish by adding a few staples to make sure the whole round is well secured.

- Once your batting is installed, repeat the same process for the top canvas.

- There you go! Your ironing board is ready.
I fixed mine on my station (screwing from underneath). But to be honest, it's not absolutely necessary. It wouldn't have run away anyway.

- I like being able to move everything without forcing.
- I like the storage space below for all my ironing pads (and more).
- I like the little piece of pipes on the left, which allows me to hang the costumes when pressed.
The last thing I have left to install is a power bar with a timer so that my iron turns off by itself if I forget it.
Otherwise, everything is finished and functional. And awesome.
So how do you find my set up?
.


